How to Use Google Ads Editor
One of the most powerful and underused tools in the Google arsenal is the Google Ads Editor. While many businesses understand the power of Google ads, setting them up, changing keywords and targeting, etc., other tasks seem overwhelming.
The good news is that the Google Ads editor lets you do things like create ad groups and new campaigns, manage keywords, and even test new ads. It’s not necessary to go to the regular ads interface unless you are making major changes based on data feedback.
Learning to use Google Ads Editor is actually a pretty easy task, at least to get started. There are some more advanced and powerful features that make this an even more amazing tool. To help you understand the Google Ads Editor and all its power, we’ve created this complete 21-point guide with tips, tricks, and examples.
If you don’t have it already, download your own copy of Google Ads editor, log in with your Google account, and follow along. There’s no mobile version of this app, so you’ll need to be on a computer, one running Windows or Mac OS. That does mean that even if you have a larger tablet like an iPad Pro, you’ll still need to break out your laptop to work in this program.
Sign in normally
Navigation
Navigation inside the editor is pretty straightforward but varies slightly depending on if you are working on a Mac or a PC based platform. In Windows applications, your application menu is at the top of the window, exactly where you would expect it to be. If you are on a Mac, the application menu is at the top of your screen.
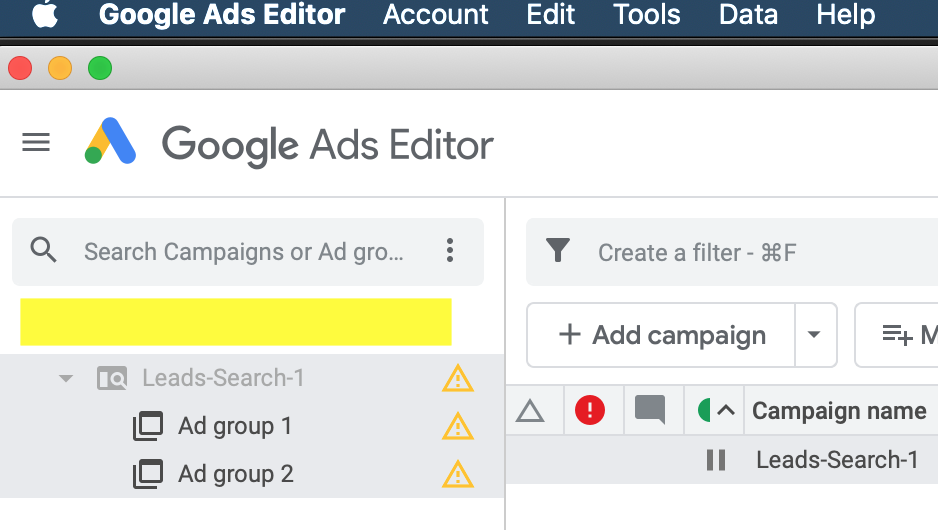
Your navigation will always be at the top 👆
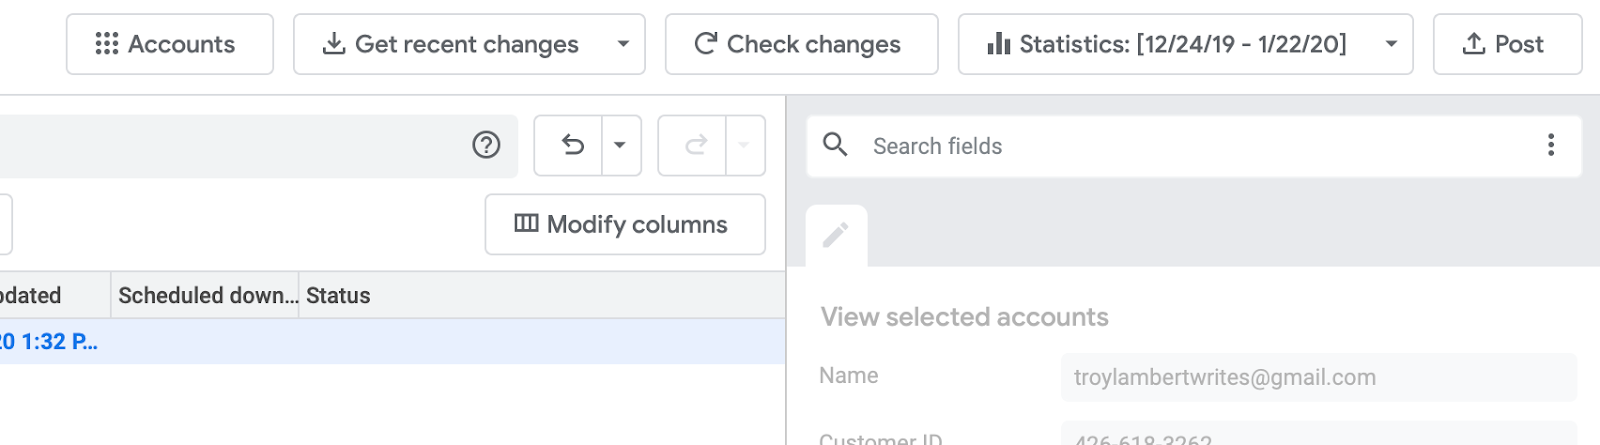
Across the top row, you’ll find the toolbar, including options to add accounts, download recent changes, check for changes, and view statistics.
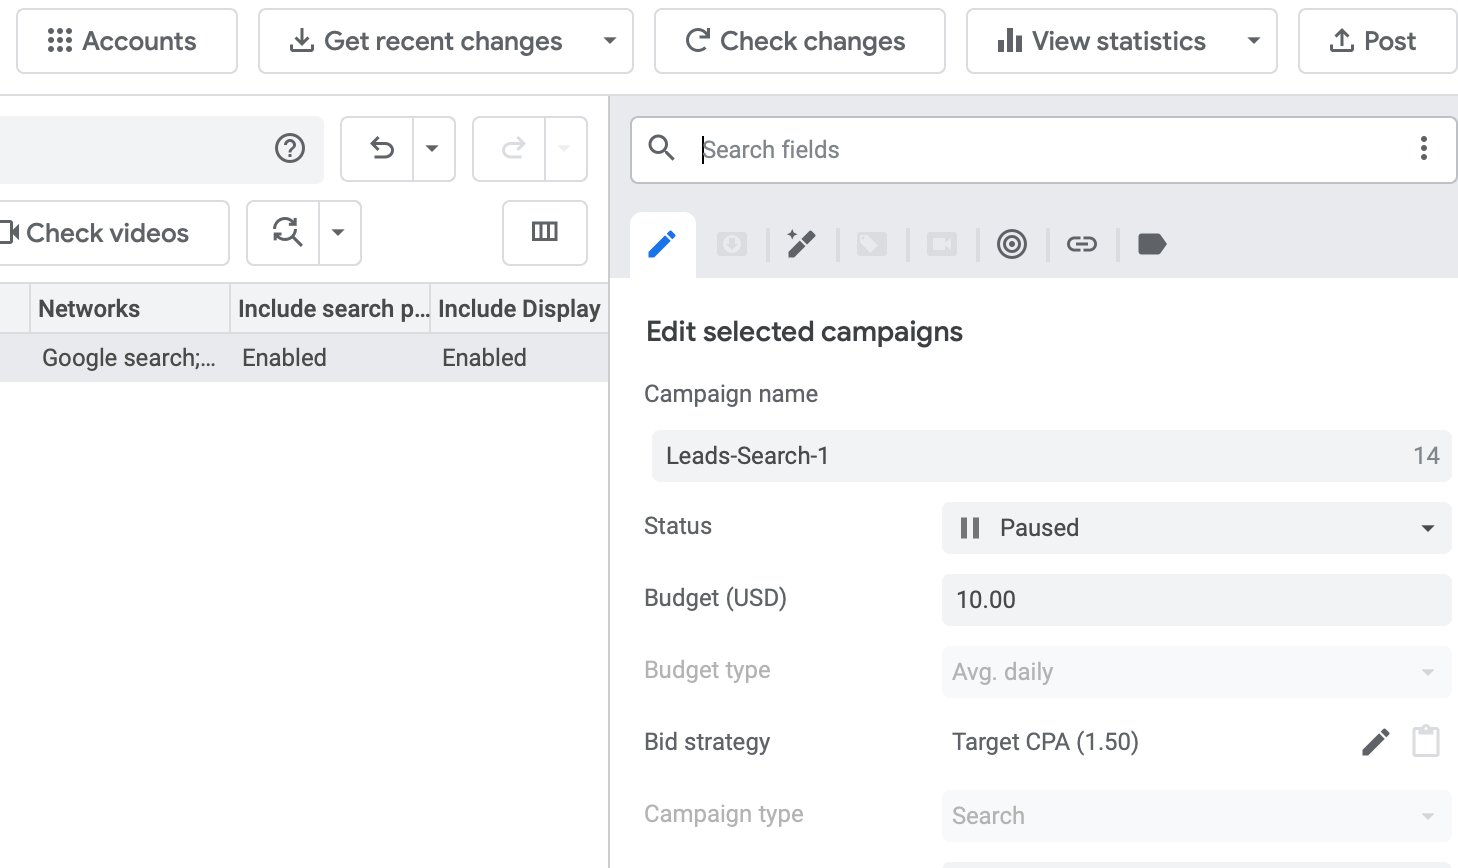
The top row has your options.
On the left-hand side, at the top is what is known as the tree view, where you can see the name of your campaigns and the name of each ad group. These can be expanded and collapsed using the tiny arrows next to the campaign name.
Further down the menu on that same side, there’s a mange section. Here you’ll select the data that will be displayed in the center of the screen in the data section.
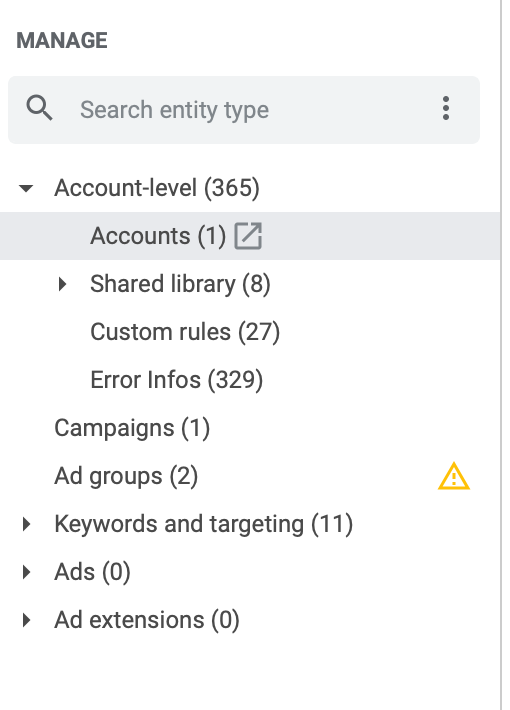
Your navigation is found in the left-hand column.
Depending on what you select here, you will change what you see in the center section of the screen. For example, if you click on keywords and targeting, the display will change to show the selected keywords for your campaign.
The display screen shows what you’ve selected from the left-hand column.
If you wish to broaden your view, you can close the menu on the left side of the screen by tapping the ladder shape at the top left of the application. On the right is where you will find a very powerful editing panel. A part of the beauty of this feature is that you can edit more than one keyword at a time by selecting multiples. The same is true of ad groups and campaigns.
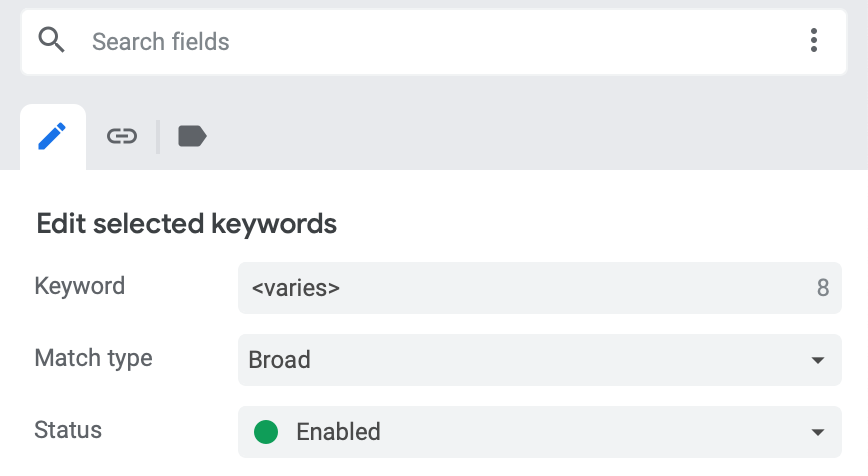
Your editing panel is located in the far right column.
Now that you know the basics of navigation, we can move forward to other features. If you have questions, they can often be answered by exploring around the menus or by checking out the Google help documentation, which is sometimes more useful than others.
Downloading Accounts and Statistics
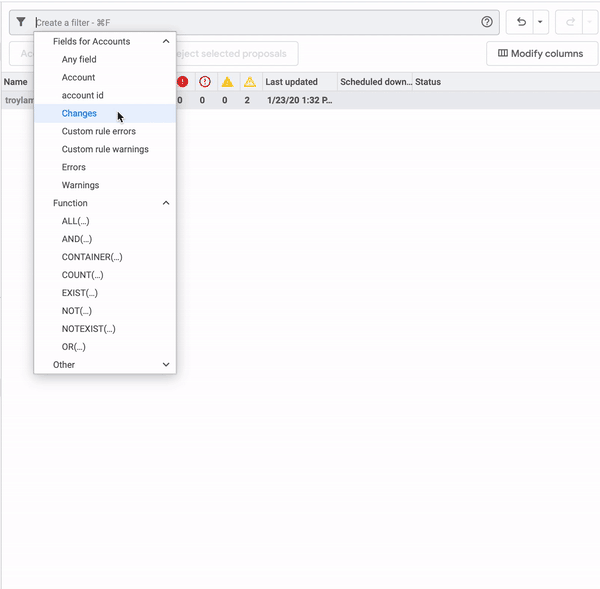
There are a number of reasons you might want to download an account and the various statistics for it. Whenever you are going to do anything with an account, the place to start is the accounts button. If you’ve already added the account to the Google Ads Editor, it will show up in your list of accounts, and you can simply check the box next to it.
If you have not yet added the account to the ads editor, simply click on the “Add” button. Then type in the account email and password, and add it the same as you did any other accounts.
Once you have the account on your list, you can simply check the box next to the account. This will reveal a menu like this one:

You can always download an account from here.
Once you select “download” you will be shown a series of options, including “All Campaigns”, “Campaigns Already Downloaded”, and finally “Campaigns I Select.” This brings up a dialog box that lets you choose the campaigns you want to download and even the ad groups within that campaign.
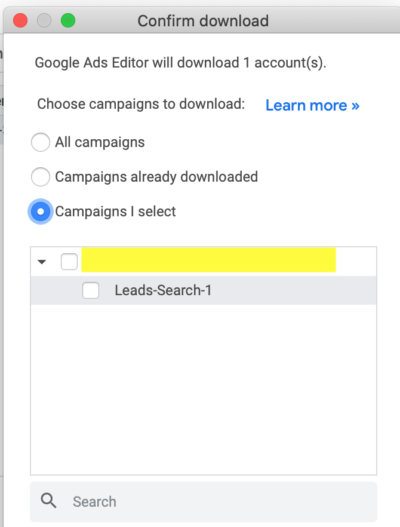
Select the campaigns you want to download.
The data you selected will appear in the data window. The only difference in this process comes if you manage other accounts. In that case, you will start with your MCC email and password rather than the individual email and password for a single account. This will download all of your accounts, and you will be able to manage them from there.
For statistics, first, click on the view statistics button on the toolbar. If you’ve already downloaded the statistics, they will appear in the data window with the date range you selected when you last downloaded them. If you want to change the date range or you have not yet downloaded statistics for the selected campaign, click on “Get Statistics.”
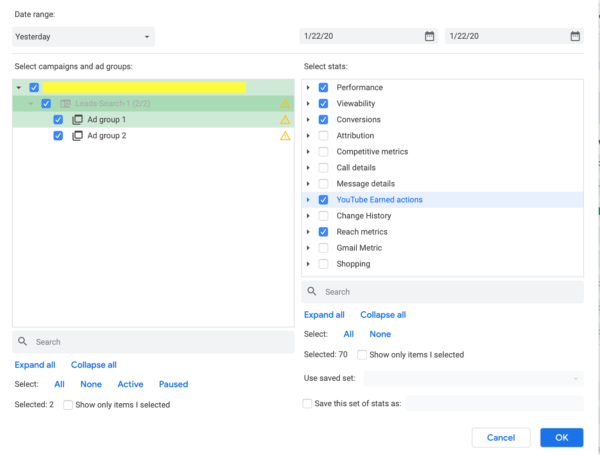
Choose the statistics you want to see 📈
You can then choose the date range, and select the statistics you would like to download. The date range can be selected from the drop-down menu with several options, or you can select custom dates on the top right.
Once you hit okay, the statistics will appear in the data window in the center of your screen. When you click on the statistics tab again, you will see this download you have created, and you will see the options to download a different set of statistics.
The big advantage? All the data and statistics for your campaigns and ad groups is in a single location. You can grab it here, combine groups, isolate campaigns, and all without going to the regular ads dashboard at all.
Import and Export
The beauty of the Google Ads editor is that you can make multiple changes to ads and campaigns, create new ones, and perform other tasks by creating a CSV file and importing it. This file can include instructions and changes to more than one campaign or ad group.
Of course, the key here is that you must first prepare the CSV file you will upload, and fortunately, Google offers detailed instructions on this. The key is to start by creating the correct column heads in the top row. Google offers a list of common Google Ads editor columns and what should go in them in this short help article.
The key is to remember that each column has a format it must be included in and there is also certain data to include so that you don’t create errors. Here’s an example from the article linked above.
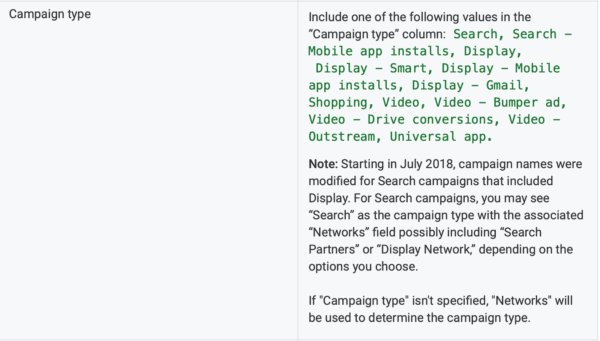
Label each of your data columns 🏷
When you perform a file import, only the first 100 rows will show up in the Google Ads Editor. This does not mean that the other rows are not there, and have not imported, but they will not be visible.
Once your file is ready, select Account and Import, then select your file. Review the column headers as they appear to make sure they are correct, and if they aren’t correct them by selecting the proper one from the dropdown menu. You can, and probably will have more than one column with the same name. For instance, for many campaigns you will have more than one keyword, so you can have several columns with the heading “Keyword” if you need them.
Once you feel the file is ready, hit import, then review the list of imported changes. Don’t worry, if you’ve made mistakes, the editor will show you those errors, and if you just don’t like how the changes turned out, you can simply reject them and try again. If you like what you see, accept changes.
One extra note on importing. You can keep the old value, like in the case of headlines. Create a column that says something like “Headline#Original.” The key is adding #Original to that column. Then create a new column containing your edits, and simply name it “Headline.” This is a great way to test the impact of changing headlines on an ad. Both sets of data will still be available in the ads editor for your reference.
You can also export files in CSV format from the Google ads editor. There are a number of reasons you would want to do this.
- Creating a backup
- Exporting performance statistics
- Exporting a summary
There is another hack, though, one that is seldom mentioned. Remember that when importing a CSV file, it has to be formatted correctly with the correct column headings? One of the simplest ways to make multiple changes is to export a file just like you would a backup, make your desired edits to that file (once you save a copy and then rename it) and then import those changes.
To access exporting an entire account, simply choose accounts from the menu, select the desired account, and choose export. If you want to only export certain parts of the account, instead go to the application menu at the top of your screen or the top of the application if you’re on a windows machine. Select Accounts, and then Export. Several options will be displayed.

Easily export individual campaigns or your entire account.
You can choose the whole account, selected campaigns or ad groups, or the current view. Alternatively, you can select custom rules.
Your browser may ask you to authorize Google Ads editor to perform downloads. You’ll also need to select a destination location for the file. Once you have done so, you can retrieve and edit your file, save it as a backup, or review the statistics you’ve downloaded and use that data to make decisions.
Sharing, Commenting and Reviewing Changes
Most companies have more than one Google ads reviewer, or they want more than one set of eyes on a set of changes before they are made. Sharing ad changes before they are approved is actually pretty simple in the Google Ads Editor.
Go ahead and edit your account in Google Ads Editor. Just don’t post the changes yet.
Export your changes in an Ads Editor Share (AES File). Do this by doing to the account tab, choosing “export whole account”, and choose the AES file style before you save the file.
Send the file to the other reviewers in your organization.
Remember, AES files are a snapshot, so if you are not going to upload changes right away, use the AEA file type instead, as a backup, and then re-import it later.
If the reviewer wants to comment on the changes, they can simply highlight a row and in the editing panel select “Add Comment.” This is a simple way to pass notes back and forth about changes before they’re made.
The reviewer can either send the file back to you with their comments and reviews, or they can simply make changes and then post the changes in the Google Ads Editor, then re-create a new AES file for the next reviewer if needed. The reviewer also has the choice to edit changes. Editable changes include:
- Existing items
- New items
If an item has been removed or moved, you can’t edit the change, but the reviewer can reject the change, and it will either be restored or moved back to its previous location.
So how do you do the next step and post changes in the Google Ads Editor? It’s actually a pretty simple process.
Posting Changes
Once you have thoroughly checked your changes to make sure they are correct, posting them is a pretty simple process. Simply select the post option from the right side of the screen.
Use the post button to submit changes.
Simply select the account you want to post the changes for, review the summary of changes, and approve them by clicking “Post.” A detailed progress window, displayed by campaign, will appear until all of your changes have finished posting.
Once your changes have finished posting, you can simply close the window and you are done.
Advanced Search Function
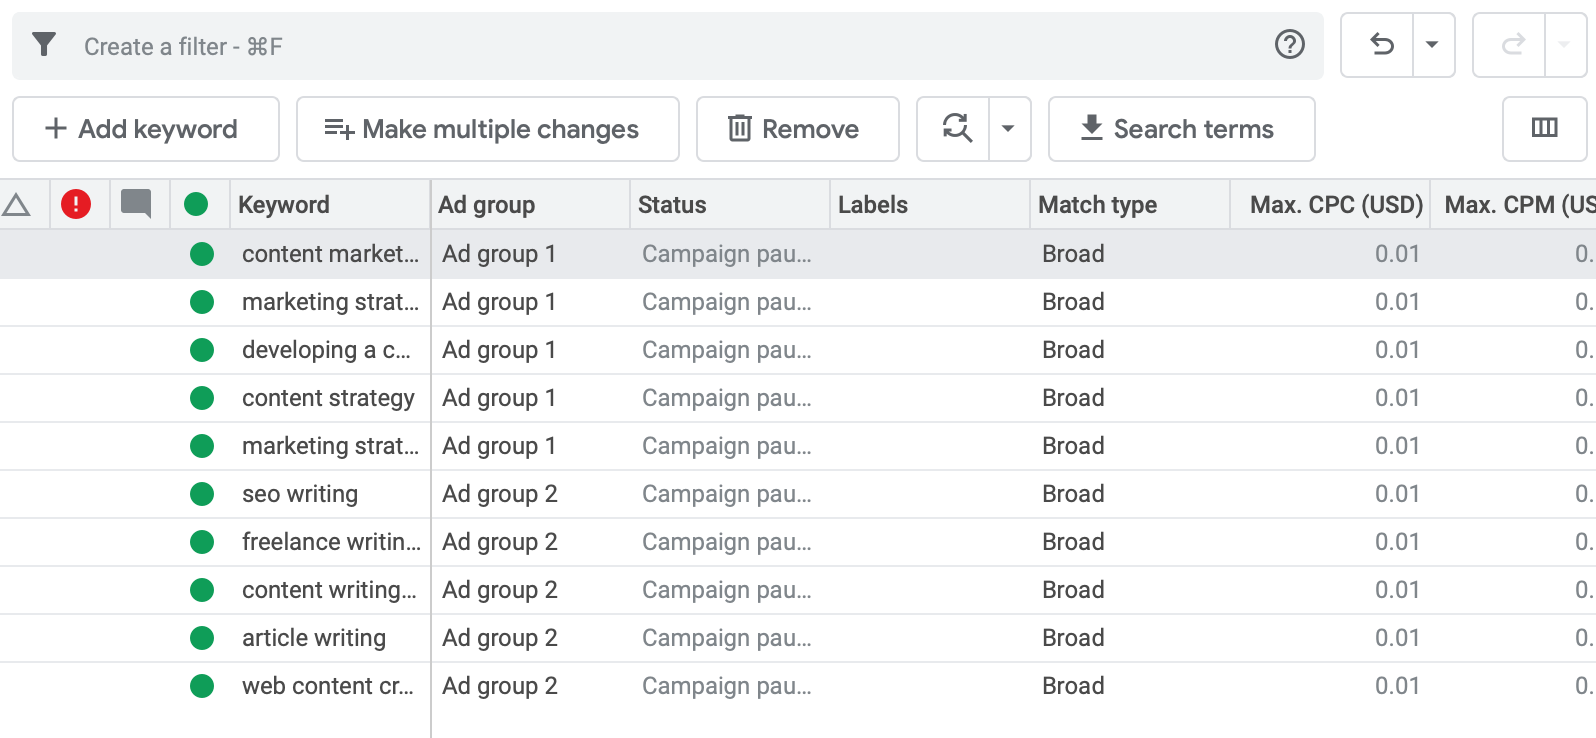
What is the advanced search function? Essentially it is the search inside the editor that allows for super-fast search without the need for an internet connection. If you have a ton of campaigns, and you want to know the ones that contain the words “content strategy” for example, the filters of advanced search make it possible to find them quickly and easily.
The choices are varied and it’s amazing how specifically you can drill down. Once you’ve applied your filters, perform your search, and you’ll get just the results you need.
Easily add filters to find exactly what you’re looking for 👀
A caution here: if you are searching for something and your campaigns or ad groups are not showing up, check to make sure you have cleared all the previous filters from another search. That might be the reason. The best practice is to clear your filters after every search you perform.
Custom Rules
One of the most overlooked and powerful parts of the Google Ads editor is the ability to create custom rules. They are essentially in place to notify you of violations of best practices before you post a campaign.
There are some built-in rules, but if they don’t apply to your particular types of campaigns, you can disable them or even edit them.
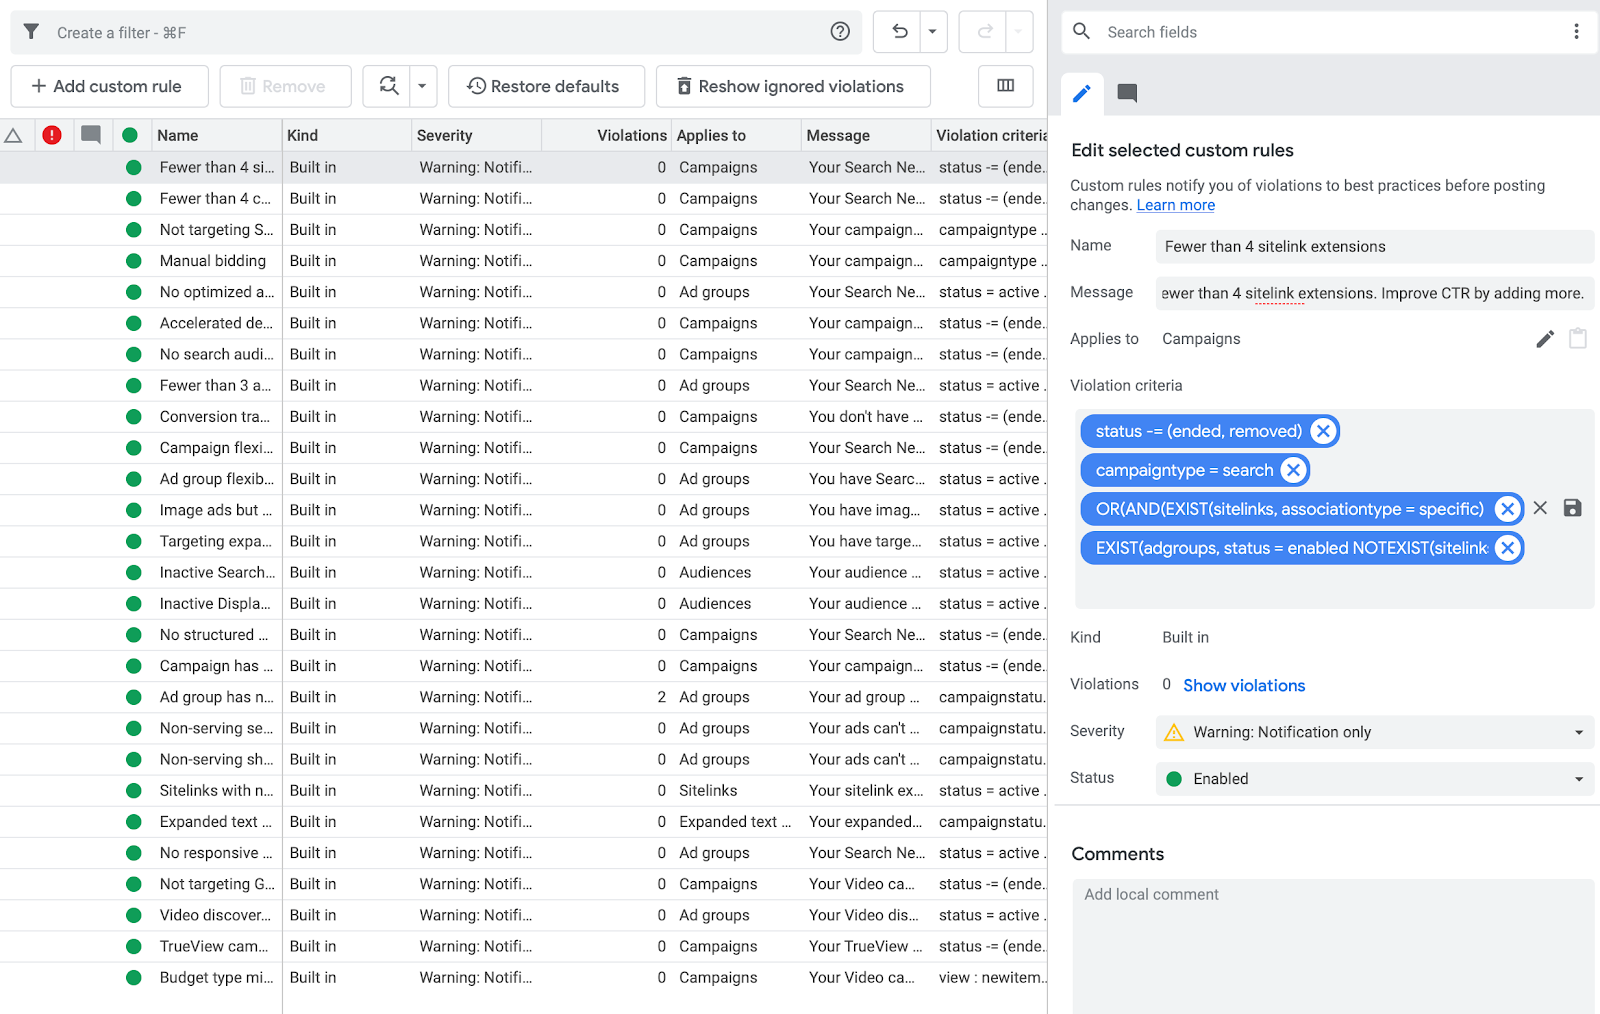
Set the rules here 👆
However, it goes further. You can also create your own custom rules with various different parameters that fit your unique ads.
Again, a caution here. Always look carefully at the default rules already in the system. They may already do what you want to do, or they could be easily modified. There’s no need to put in work creating something that is already in place.
Manage Video Campaigns
Video campaigns are huge, and managing them properly is critical to their success. Fortunately, much like other ads, you can use Google Ads editor to manage them effectively. There are several actions you can take without going to the standard ads dashboard.
You can create video campaigns. Simply choose the account where you want to add the campaign and click on the arrow next to “Add Campaign.” Then choose “Video Campaign.”
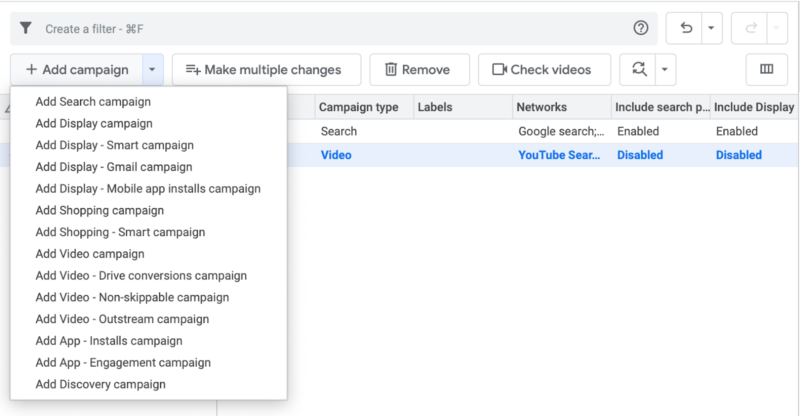
Other campaigns you can create in Google Ads Editor
Once you have created it, you can also edit the add in the data view, and change several different things about each ad. They include:
- Content Exclusions: categories where you don’t want your ads to show.
- Network Settings: YouTube Search, YouTube Videos, or include content partners.
- Bid Strategy: Manual or Automatic CPV Strategy.
Just like with other ads, you can create ad groups for your video ads as well. There is a stipulation here. The video ad type must be the same in each ad group. So if you have an “in-stream” ad group, you cannot add an “in-display” ad to that group.
The other things you can edit in the Google Ads Editor include fields like Video ID, status, and final URL. You can also set or edit the image that is associated with the video by uploading an image or replacing the uploaded one with a new one.
Call Only Ads
Call only ads are those that encourage buyers to call your business. You can create and manage these in the Google Ads Editor, and you can also decide whether to track call responses and even whether to count a call as a conversion.
Edit call-only campaigns
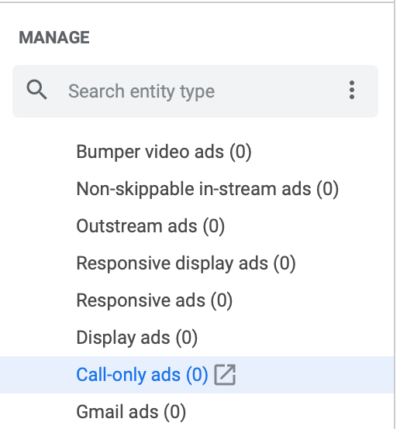
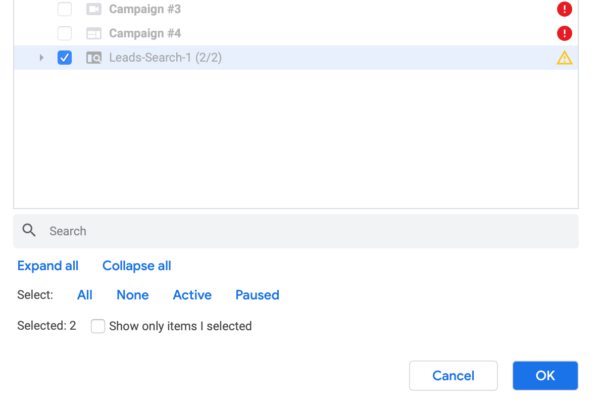
Start by going to the ad type section in the lower left-hand corner and selecting ad type, and call-only ad. Then highlight the campaign desired. This will bring up another option in the display area menu. Click on the “Add Call Only Ad” button.
You’ll be able to add call-only ads
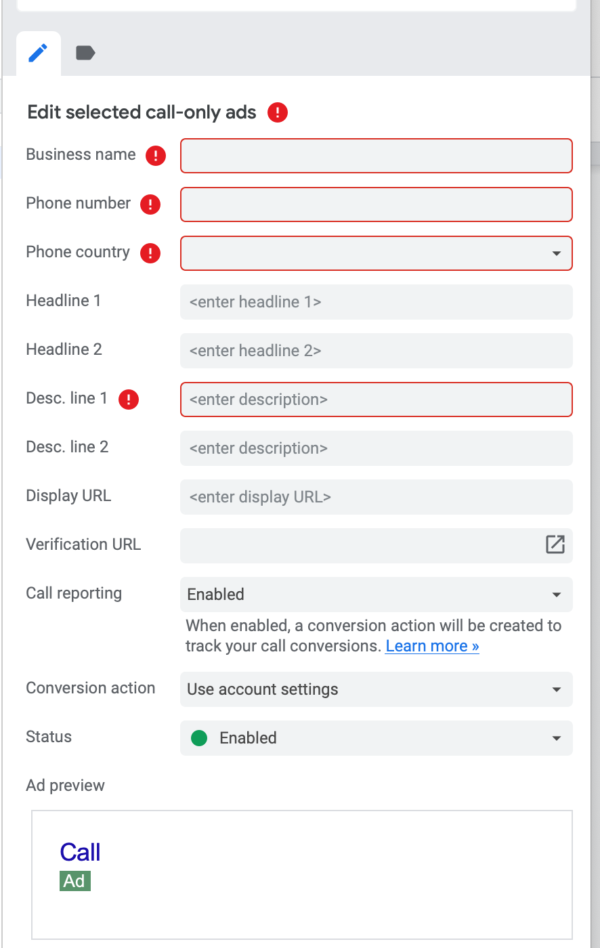
Once you confirm your selection by pressing “Okay” the options will appear in the editing frame at the right side of your screen. You’ll need to fill in all the areas highlighted in red, and make selections about call tracking and whether a call counts as a conversion or not.
Setting up & editing call-only ads
In short, the tools in the Google Ads editor allow you to create, edit, and monitor call-only ads in the same way you do any other type of ad, and you can create new ads in a matter of minutes.
Smart Bidding Management
First, if you haven’t familiarized yourself with Smart Bidding, you should This tool is good for both large and small businesses, because it takes data from all of your campaigns and couples it with machine learning. Instead of setting specific bids, you can instead optimize by conversion value or conversions themselves. This is a great method for getting a much better return on your investment.
Google ads editor is a great place to manage your bidding strategies and smart bidding. You can also see first-page bidding estimates and more.
Like with other features, you can import bid strategies in bulk using CSV spreadsheets. Just include “bid strategy type” and “bid strategy” in the columns when you upload changes. When you include bid strategies in uploads, there are a few things you should remember.
- To apply portfolio bid strategies, use “Bid Strategy Name” in one of your columns. This tells Google ads that you want to change the portfolio strategy type.
- When you want to apply standard bid strategies, use the “Bid Strategy Type” column.
- Remember portfolio bid strategies are case sensitive. So if you have “Campaign Bid Strategy 1” in your shared campaigns, that will not be the same as “campaign bid strategy 1”.
Smart bidding strategies are rapidly becoming the norm for many campaigns. Knowing how to manage them in Google Ads editor is critical.
Daily Budget Recommendations
When you start missing out on traffic due to budget constraints, Google will let you know by offering you a recommended budget. This will show up in your campaign tab if you missed more than 10% of potential traffic in the previous week.
This recommended budget is the number you would have needed, according to Google, to get more of those impressions that you missed out on. Because you can also edit your budgets in Google Ads Editor, you can either immediately adopt this recommendation or ignore it, depending on your budget and goals.
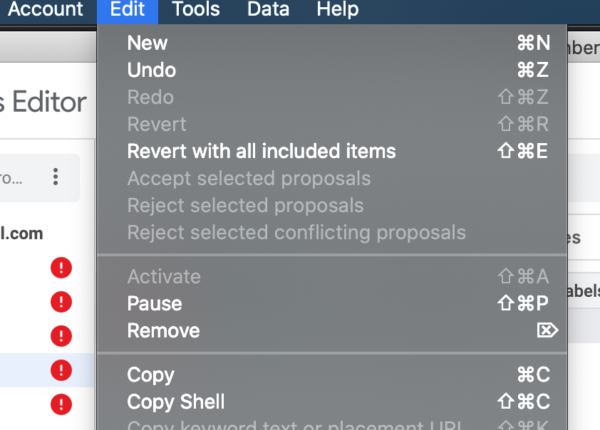
Copy & Paste
Just like in the standard Google Ads dashboard, you can copy ads, campaigns, keywords, ads, and ad groups.
Copy & Paste is a standard feature in the editor.
This can be done from the edits tab on the application menu, but you can also use the standard keyboard shortcuts, Command+C on Mac, and Control+C on a PC. Once you have copied an ad, or series of keywords, or even a campaign, you can paste using the same menu or the standard keyboard shortcuts of Command+V or Control+V.
This makes creating a new campaign from an old one fast and easy.
Removing Duplicate Keywords
Finding duplicate keywords is a valuable tool, and as such is accessible through the tools menu of the application. Once the keywords appear in the data window, you can decide what to do with that information. For example, you might want to remove the duplicate keywords with the lowest click-through rate.
You can do this in the data window by choosing “Select Duplicates By…” You can filter by the following criteria:
- Maximum CPC
- First-page bid estimate
- Top of page bid estimate
- Quality score
- Average CPC
- Average CPM
- CTR
- Impressions
- Average position
Remember, that before you perform this action, you should be sure you have the latest information downloaded. If you search for the lowest CTR, for example, and you don’t get any date for certain keywords, it could be that there is no CTR information downloaded for those keywords.
Google Ads Editor can only work with the information you give it, so be sure you have the right data downloaded for each campaign. This tool does make it insanely easy to take action on duplicate keywords and sort them in a variety of ways.
Create Ad Groups Insanely Quick
Creating ad groups is one of the best ways to manage your ads, and with Google ads editor, you can create a new ad group insanely quick. Here’s how it works:
In the ads type at the bottom of the page on the left, simply select “Ad Groups” when you’re inside the campaign where you want to add a group. The new group will appear in the data window and in the editing window on the right.
In that window, you can edit the ad group name, type, and more, like this example:
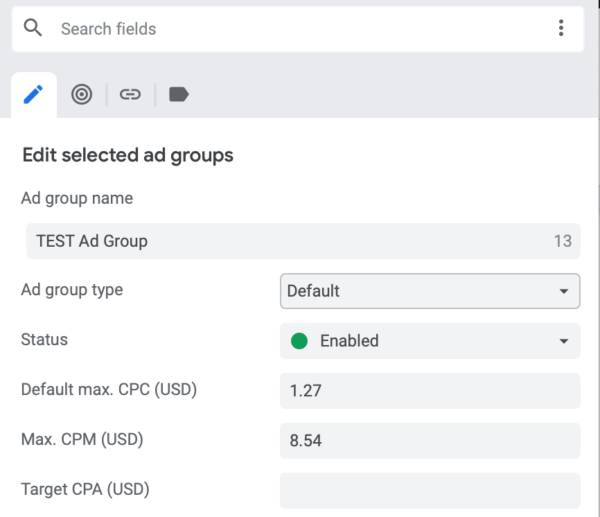
You can set CPC or CPM bidding options
We have inserted the name TEST ad group, left the type as Default, although you can make your selection through the drop-down menu. We’ve also set a maximum for CPC and CPM. The process takes under a minute, and then from this screen, you can refine your ad and set up everything from reach to URL options.
Fast, easy, and all without going to the regular Google ads dashboard at all.
Replace Text
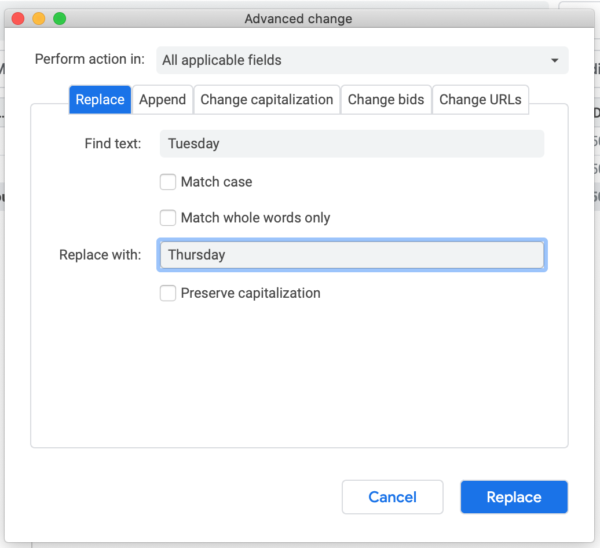
Let’s say you have an ad running for wing night at your chain of restaurants, but you want to change that night from Tuesday to Thursday. You can find and replace text easily in several items at once in the Google Ads Editor.
You’ll find the option under “Edit” in the application menu. You can see from the graphic below that you can make several choices about your selection, from matching case to include only whole words. You can also preserve capitalization, which can be important in avoiding typos.
For example, if “wing night” has a typo, or you want to change it to “wing nite” and it appears at the beginning of a sentence, “wing nite” would become “Wing nite” automatically, avoiding the lower case letter at the beginning of a sentence.
You can select the fields where you want such actions to take place, and this is a place where you can do things like change URLs, bulk change bids, and more.
Bulk replacements come in super handy 👍
The “replace text” is another valuable tool. Do be cautious when using it, and be sure you have selected the correct fields. Otherwise, you run the risk of making changes in other fields that can potentially cause errors.
Offline Changes
Let’s say you are traveling and the $8 WiFi on the aircraft isn’t appealing to you on a one hour flight. Don’t worry. You can make changes in the Google Ads Editor, and apply them when you are in service again. Just be sure you are working on the latest downloaded data, and you can make changes and upload them at your convenience.
You don’t have to have a connection to make these changes. You do need it to post them or to download new information. Still, the ability to work offline on Google Ads offers a huge advantage to those who travel often or might find themselves somewhere the internet access is non-existent or poor.
Advanced Bid Changes
Advanced Bid Changes are a great way to change ad bids on all or some of your keywords. The key first step is to make sure you have the keywords highlighted that you want to change. Then the place to make changes is found in the same menu where we found “Replace Text” earlier. In that same window, just select the “Change Bids” tab. Your screen will look like this:
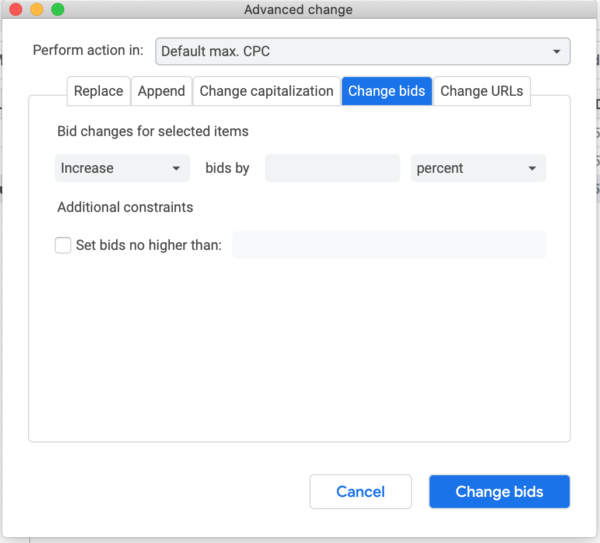
How to make bid changes in bulk
You can choose to increase or decrease bids by either a percentage or by a certain dollar amount.
The only word of caution here? Be careful about the keywords you have highlighted. If you just want to change bids on some of them, and you have all of them highlighted when you open this menu, they will all be changed. You can revert those changes, but it is less than convenient to have to take this extra step.
CSV Uploads/Downloads
We’ve talked about this powerful tool already under import and export, but what bears repeating here is the number of things you can do and change through bulk uploads. You can make a variety of ad changes, from headlines to keywords to bids. You can also create backups, export statistics for sharing with your team outside the Google Ads platform, and even export performance summaries.
The Google Ads editor will even alert you to errors when you are importing changes, and give you a chance to correct them. To do this, you will just go to the accounts menu, and choose either import or export depending on what you want to do.
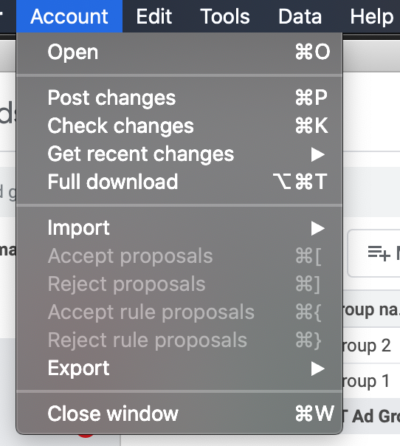
Import or Export from the Account Option
As we’ve stated earlier, this is a great way to be sure you get the file format correct for an upload. Simply perform an export download, make changes, and upload the new file through the import feature.
Improved Productivity
The number one advantage of Google Ads Editor? Increased productivity. Think about it. You can make bulk bid changes, changes to headlines, keywords changes, and more. You’ll create ad groups and ads in no time, and can monitor them, export statistics and results, and even make changes when you find yourself offline.
Additionally, features that allow your team to share, comment, review, and make changes means a faster ad turnaround when you need it. You’ll save hours of time and frustration simply by knowing how to use the Google Ads Editor and the advanced features it offers. From video ads to call-only ads, your ad management just got easier.
Best of all, this tool is free, and Google wants you to use it. So what are you waiting for? Get started today!

Luke Heinecke
Founder/CEO
Luke is in love with all things digital marketing. He’s obsessed with PPC, landing page design, and conversion rate optimization. Luke claims he “doesn’t even lift,” but he looks more like a professional bodybuilder than a PPC nerd. He says all he needs is a pair of glasses to fix that. We’ll let you be the judge.
Leave us a comment.
Subscribe to our blog
Subscribe to our blog
Get weekly PPC & CRO advice sent straight to your inbox.